Rendering in Blender September 25, 2024 Create a New Blender Scene To start, launch Blender and create a new scene to begin setting up your rendering environment. You can save this scene and reload it later with the same solution, preserving your work.
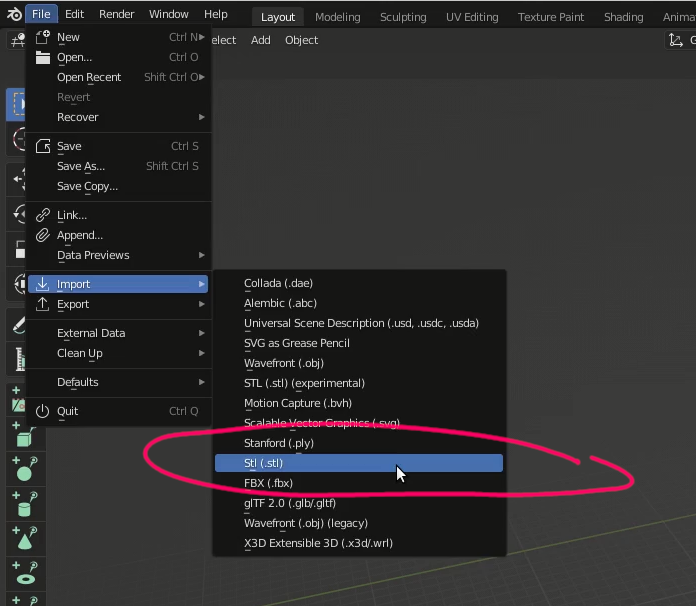
General Usage Import Mesh Files Blender allows you to import meshes, such as STL files , from previous steps in the workflow. These might need to be resized or adjusted for Blender’s scale.
Go to File > Import > STL (.stl) Imported objects might be scaled too large or small. To adjust, go to the Layout tab, select the object, and press n to open the options for scaling.
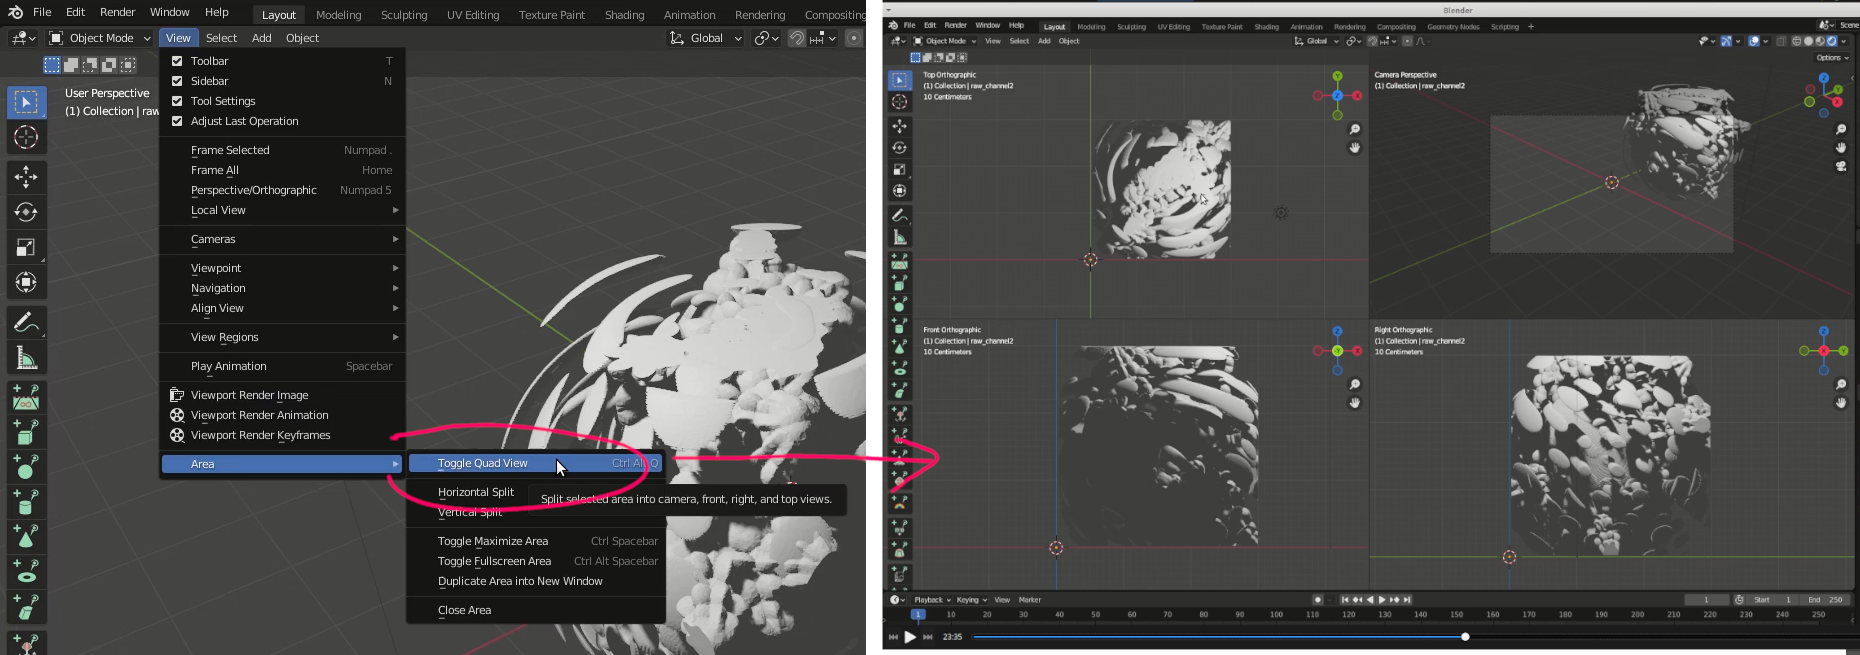
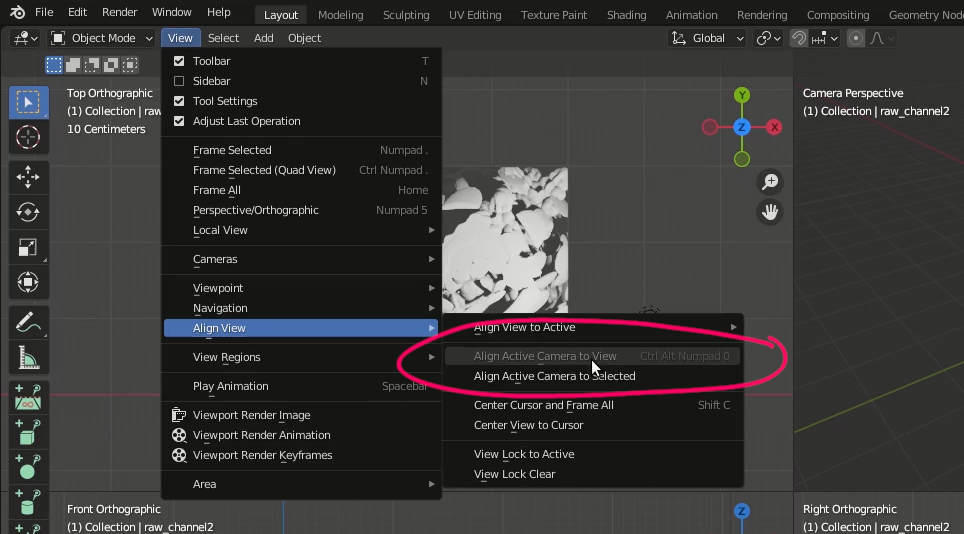
General Usage Toggle Quad View The quad view gives you orthogonal views (top, side, and front) simultaneously, which is useful for positioning objects accurately. To enable Quad View , go to View > Area > Toggle Quad View General Usage View from the Camera To see what the camera is capturing, you can switch to the camera view and adjust the perspective for rendering. Go to View > Viewpoint > Camera for switching to camera view Go to View > Align View > Align Active Camera to View for adjusting the camera to the current view
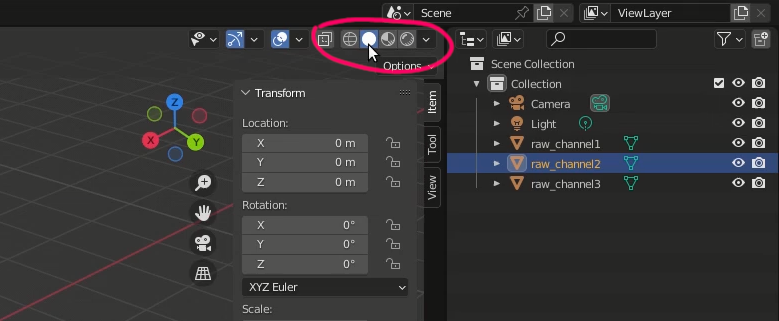
Set View Parameters Adjusting viewport shading and view parameters can improve performance or give you a clearer preview of your rendering, depending on your hardware.
Use the Viewport Shading buttons in the top right corner to change shading modes: Rendered mode for full previews.Material preview mode for a balance between performance and detail.
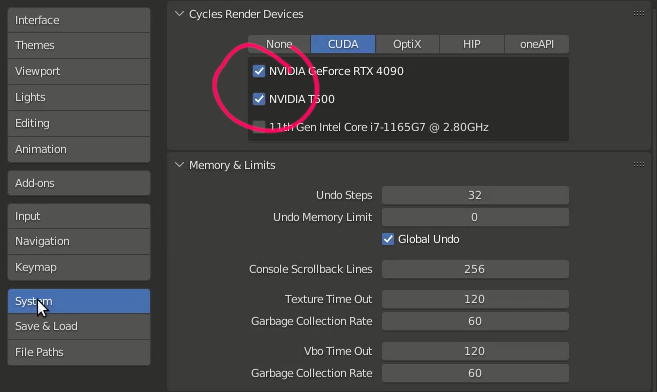
Adjust GPU Settings Blender relies heavily on your system’s GPU for rendering. Ensuring your GPU is properly configured will improve performance and the quality of your renderings.
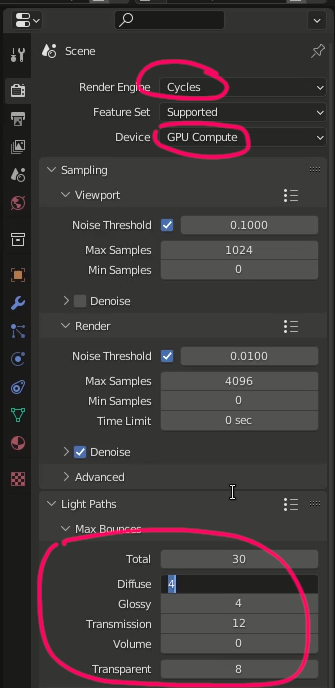
Blender requires a GPU with at least 2GB of VRAM . To configure your GPU, go to Edit > Preferences... > System > Cycles Render Devices Ensure that GPU Compute is selected under Cycles as the Render Engine .
Adjust Render Parameters Tweaking render parameters can improve the visual quality of your render, especially when working with reflective or translucent materials such as glass.
In the Rendering tab , under Render Properties, increase values in the Light Paths section with glass or
glossy materials, or decrease these values to improve performance. In Output Properties , Adjust the resolution percentage for fast preview renderings or detailed print renderings.
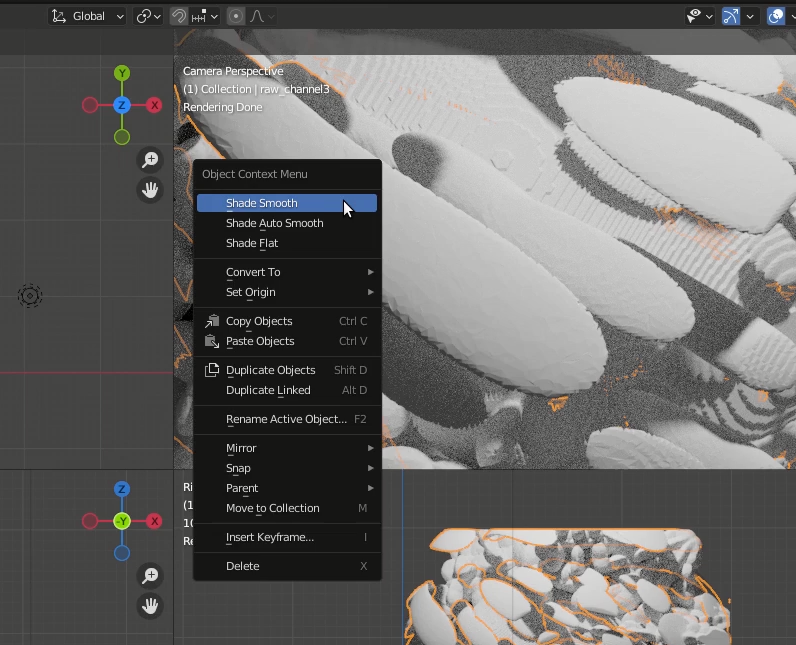
Object appearance Smooth Shading for Objects Smoothing the shading of objects can make your mesh appear less blocky and more polished, especially for organic shapes. Right-click the object and select Shade Smooth to apply smooth shading.
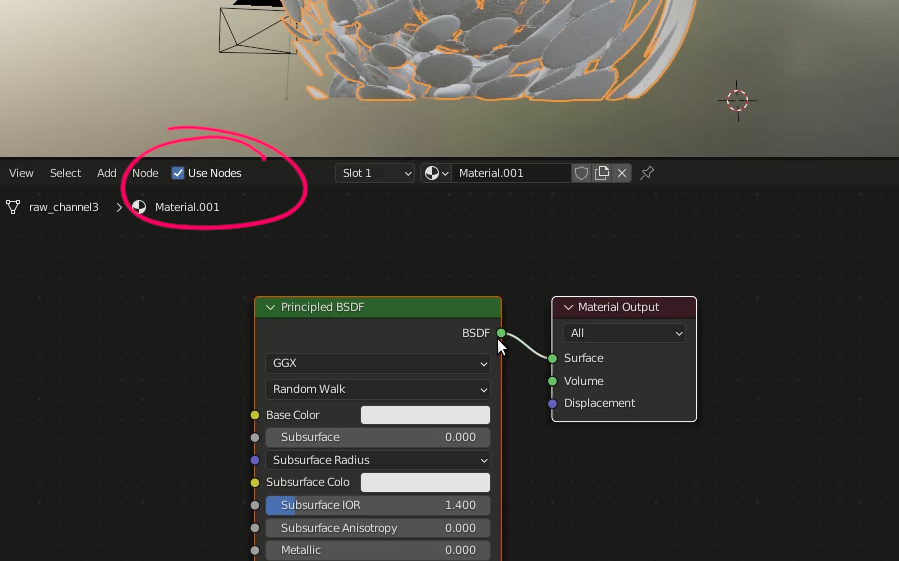
Object appearance Apply Material to Object Blender’s Shading Tab allows you to apply complex materials to your objects, including gloss, transparency, and other physical properties. Experimenting with the Principled BSDF shader can give you a wide range of effects.
Go to the Shading tab and select Use Nodes . Explore the options under Principled BSDF : Increase Subsurface to make materials look soft. Use the Add > Search function to find shaders like Glass for transparency effects.
Denoising the Render Blender includes a denoising feature to remove noise from rendered images, improving quality without significantly increasing render time.
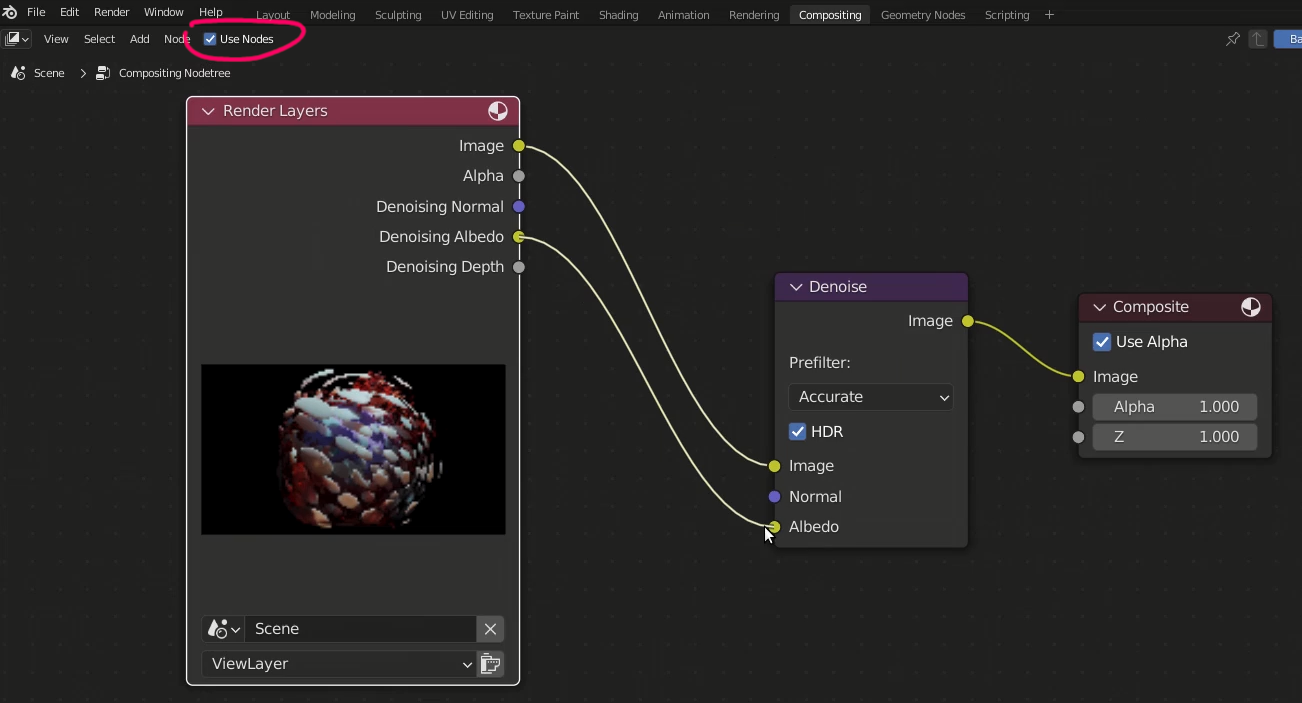
In the Rendering Tab , under View Layer Properties: Under Passes > Data, select Denoising Data . In the Compositing Tab : Check the Use Nodes checkbox. Add a Denoise node (Add > Search > Denoise) and connect the nodes as follows:Connect Render Denoising Normal and Denoising Albedo to Normal and Albedo of the Denoise node. Connect Image from the Denoise node to Image of the Composite node.
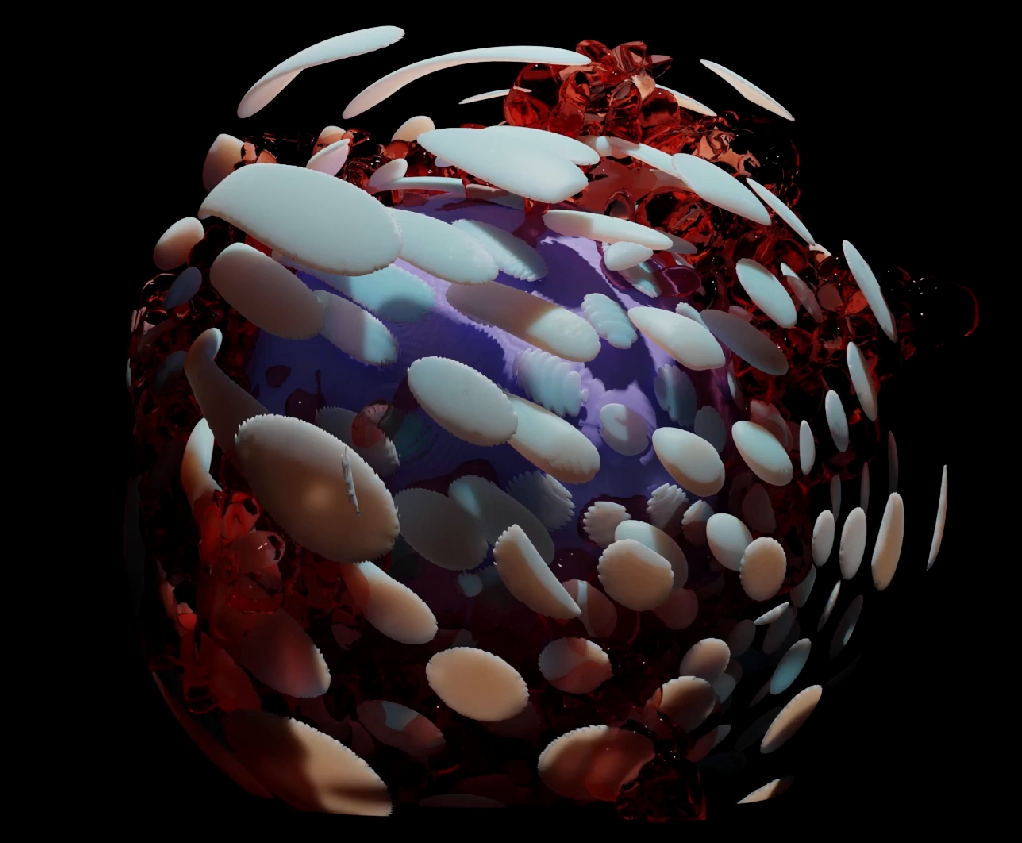
Happy rendering! Once you’ve completed these steps, you will have a beautifully rendered scene in Blender. Feel free to explore
Blender’s other features, experiment with different materials, lighting setups, and camera angles to get the best results.