Cutting mesh structures in Blender September 25, 2024 Introduction Cutting into mesh structures in Blender can be incredibly helpful for scientific visualization, especially when dealing with complex datasets. By cutting into an object, you can reveal internal structures that would otherwise remain hidden, providing deeper insights into the data.
For example, in our research, we visualized the structure of a beta cell from the following publication. We cut into the 3D volume, revealing important internal details that ended up getting featured on the cover of the journal.
3D rendering of a mouse pancreatic β cell showing the complete nucleus (white), all microtubules (red), and cut-outs of insulin secretory granules (light orange), the mitochondria (blue), the Golgi apparatus (green), and the plasma membrane (transparent).
The dataset shown in this tutorial originates from the same publication.
Preparation Converting volumetric data into meshes Before working in Blender, it’s important to convert volumetric datasets, such as TIFF files, into mesh representations. Volumetric datasets are often used in scientific contexts, but rendering them directly in Blender can be challenging. By converting them into meshes, you can use Blender’s powerful tools to manipulate and visualize the data in 3D space. Preparation Creating a Blender scene from meshes Once your volumetric data has been converted into a mesh, the next step is to create a scene in Blender. This involves importing your mesh into Blender, setting up the lighting and camera, and preparing the scene for rendering. By creating a 3D scene, you can explore the dataset from different perspectives and apply advanced rendering techniques. Intro to modifiers in Blender Blender’s modifiers are non-destructive tools that allow you to perform complex operations on mesh objects. Modifiers like the Boolean modifier are essential for cutting into meshes without permanently altering the original geometry. This is useful when you need to explore different cuts or visualizations without losing the integrity of your dataset. Non-destructive operations Calculated in the rendering process, but can also be applied to become permanent modifications
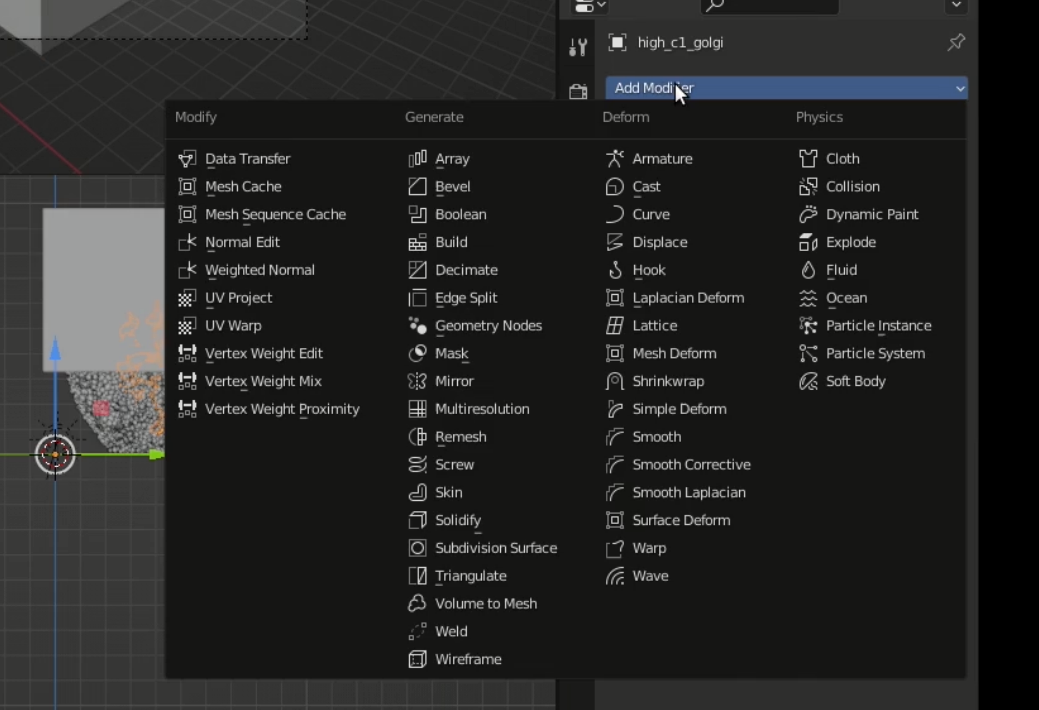
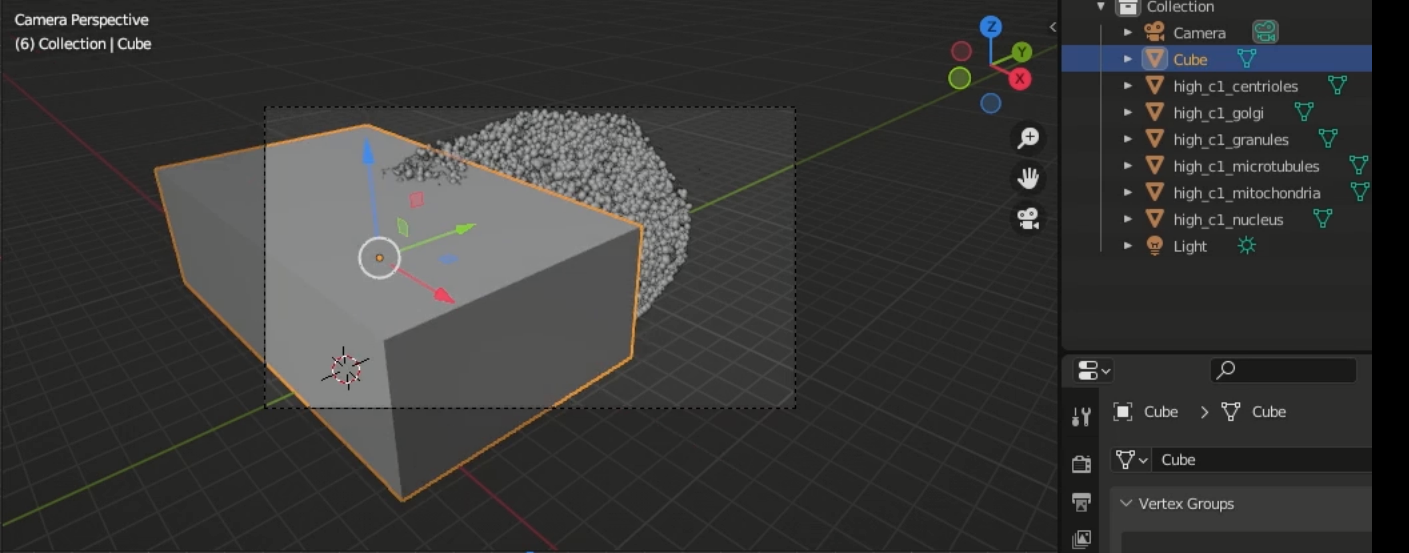
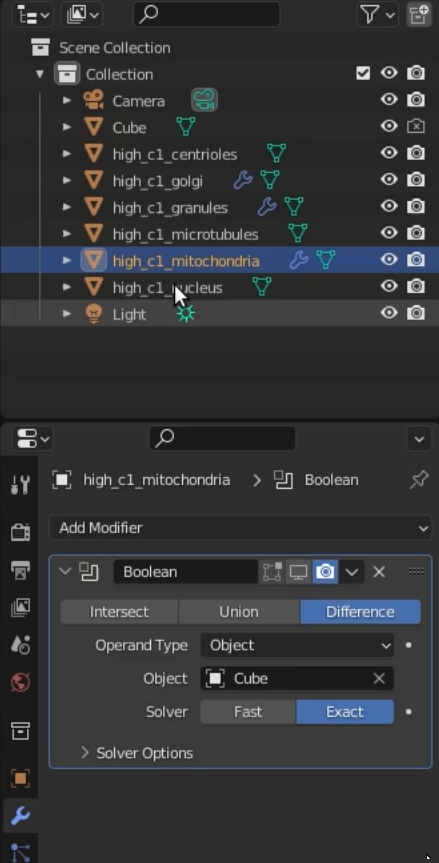
Add shape which will be removed from the dataset To cut into the mesh, you’ll need to create a secondary object, such as a cube or sphere, which will act as the cutting tool. This object will be subtracted from the mesh using the Boolean modifier , creating a hole in the mesh and revealing its internal structure. Steps: Add a cube , sphere , or any shape that represents the area you want to remove from the dataset. Position the object over the part of the mesh you want to cut. Use boolean modifier with shape The Boolean modifier allows you to cut, subtract, or combine two mesh objects. In this step, you will assign the object created in the previous step (e.g., a cube or sphere) as the Boolean operand for the mesh. This will create the cut and reveal the internal structure of the mesh.
When applying the Boolean modifier, make sure the mesh object and the cutting object have clean, non-overlapping geometry to avoid artifacts during the cut.
Boolean Modifier : Used for cutting, union, or intersection operations between meshes.
Steps: Select your mesh object. In the Modifiers tab, add a Boolean modifier . Set the operation to “Difference” and select the cutting object. Apply the modifier to perform the cut permanently.
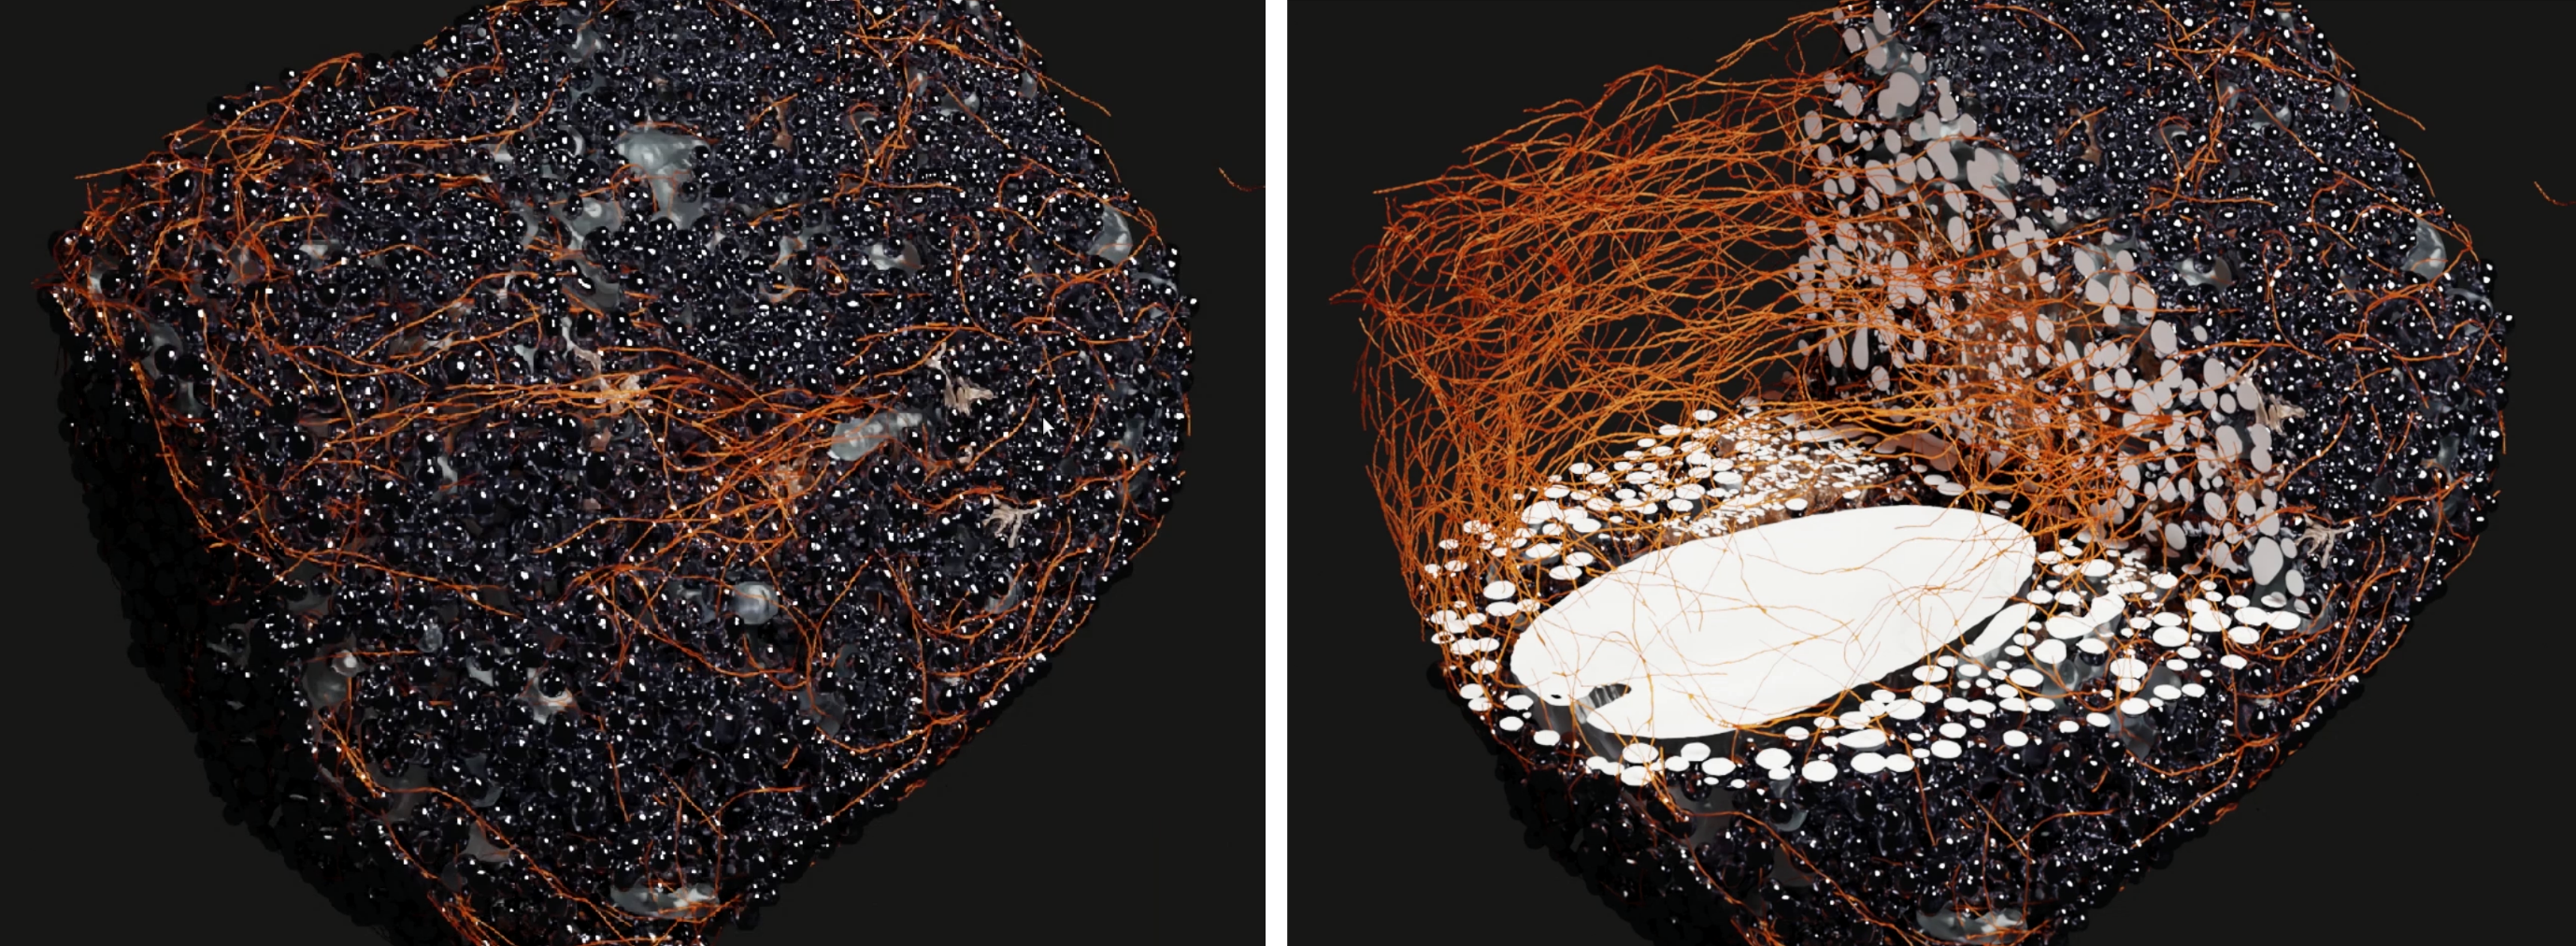
Hide shape and render After applying the Boolean modifier , the cutting shape can be hidden or deleted, as it’s no longer needed in the final rendering. The mesh will now appear with the cut, showcasing internal structures.
At this point, you can adjust the lighting and camera positions to highlight the newly exposed areas and render the final scene.
Final Steps: Hide or delete the cutting shape (if you applied the modifier). Render the scene to reveal the internal structures of the mesh. Have fun experimenting and discovering new ways to visualize your scientific datasets!